Corner Bead Removal Guide: How to Remove Corner Bead Without Damaging Drywall

Professional contractors know that successful corner bead removal starts with understanding your existing installation and choosing the appropriate removal method.


The right approach prevents costly drywall repairs and saves time. This guide covers proven techniques for removing corner bead while preventing drywall damage during the process.

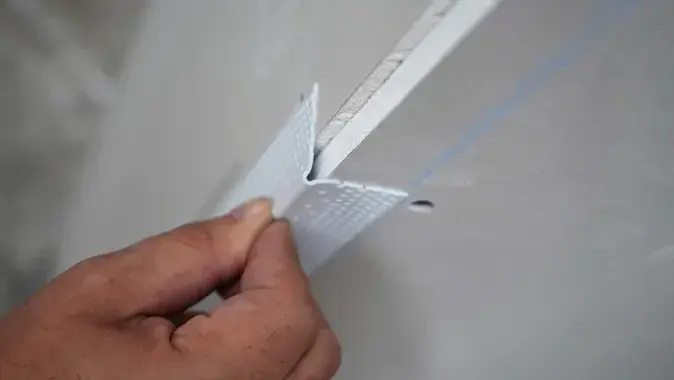
Essential Tools for Corner Bead Removal

The right tools make corner bead removal significantly easier and reduce the risk of drywall damage.


The primary removal tools you’ll need include:

  • A heavy-duty utility knife with fresh blades for clean cuts through joint compound
  • A flat pry bar for controlled leverage when pulling the corner bead away from the drywall
  • A hammer to precisely position the pry bar when needed
  • Professional-grade joint compound knives to protect surrounding drywall


You’ll also need repair supplies, including:

  • Setting-type joint compound for immediate repairs
  • Paper drywall tape to address torn facing
  • Sanding blocks for feathering repair edges
  • Spare utility knife blades
  • Clean rags for compound cleanup


Having these tools and materials ready prevents project delays and ensures professional results. Before starting, replace any worn tools — dull blades and damaged pry bars increase the risk of drywall damage.

Understanding Corner Bead Types and Their Removal Challenges

Vinyl corner beads, particularly newer installations using adhesives or mud-set techniques, are often removed more cleanly. The material's flexibility allows it to separate from the drywall with less resistance, reducing the chance of damage during removal.


This makes vinyl the preferred choice not only for initial installation but also for future renovations or repairs. Vinyl corner beads are also far less likely to need to be removed in the first place; most impact can be fixed with a simple mud patch, whereas metal beads will probably need to be ripped off and replaced.


The age of the installation also affects removal difficulty. Older installations often have multiple layers of joint compound built up over decades of repainting and repairs. These layers can make it harder to identify the edge of the corner bead and require more careful scoring before removal begins.


Newer installations typically have cleaner lines and more consistent joint compound application, making removal more straightforward.

Professional Preparation and Safety Measures

This image depicts a Trim-Tex worker using a saw for cutting corner bead.

Proper preparation — including protecting the surrounding surfaces, wearing proper safety equipment and scoring the paint and joint compound — prevents injury and property damage during corner bead removal.


Surface Protection

Start by protecting adjacent surfaces. Cover floors with canvas drop cloths, which stay in place better than plastic sheeting. Remove or mask off baseboards, door trim and window casings that might interfere with corner bead removal.


Personal Protective Equipment (PPE)
 

PPE requirements go beyond basic dust masks. When removing older installations that might contain hazardous materials, wear a proper N95 respirator.


Additionally, wear cut-resistant gloves to protect your hands while maintaining the dexterity needed for precise work.


Don’t Forget Scoring

The most critical preparation step is scoring the paint and joint compound along both sides of the corner bead.


Use consistent, moderate pressure with a sharp utility knife, making multiple passes rather than trying to cut through all layers at once. This careful scoring prevents the drywall paper from tearing beyond the corner bead edge, which would require more extensive repairs.

Step-By-Step Removal Process

Regardless of the type of corner bead you use, removal starts with three steps:

  • Step 1 — Locate the Corner Bead Edge: The removal process starts with locating the exact edge of the corner bead. 
  • Step 2 — Score Both Sides: After you locate the edge, score both sides where the corner bead meets the drywall.
  • Step 3 — Begin Removal: Begin removal at the most accessible end of the installation. The key is applying force evenly across the tool's width to prevent concentrated pressure points that could damage the drywall.


For vinyl corner bead removals, start at one end and carefully pull the material away from the corner, maintaining a consistent angle. The flexibility of vinyl often allows for smoother removal, but don’t rush the process. Work in small sections of 12 to 16 inches at a time, moving systematically along the length of the corner.


If the corner bead resists removal, deepen your score lines through the joint compound or try accessing it from a different angle. Never force removal when encountering strong resistance, as this often leads to drywall damage that requires extensive repair.


Instead, find the cause of the resistance and adjust your  drywall-cutting approach accordingly.

Find Your Local Dealer

Trim-Tex beads are flying off the shelves at a dealer near you. Snag a box or a truckload of your favorite corner profiles today.

Tackling Problem Areas and Special Considerations

Doorways, windows and ceiling joints present unique challenges during corner bead removal. These areas often have additional fasteners or multiple layers of joint compound built up over years of repairs.


Take extra time to fully score and loosen the corner bead before attempting removal. Watch for signs of underlying damage or previous repairs that might affect your removal strategy.


Proper support during removal prevents sudden separation of ceiling joints  which could damage surrounding drywall. Consider asking another person to support long sections of corner bead during removal. Windows and doors often have deeper joint compound build-up at the corners — score these areas multiple times to ensure a clean separation.

Post-Removal Assessment and Repair Planning

After removing the corner bead, thoroughly inspect the exposed drywall. Minor paper-facing tears within the corner bead footprint can be addressed with standard joint compound and tape repairs. However, look carefully for signs of gypsum core damage, which requires more extensive repair techniques.


Finally, check the corner's structural integrity. If the drywall edge shows crushing damage or severe deterioration, consider installing a drywall patch before applying a new corner bead. This extra step ensures a solid foundation for your new corner protection.

When To Repair Versus Remove Corner Beads

This image depicts a corner bead being held up to drywall.

Not every corner bead issue requires complete removal. For minor dents or separations in vinyl corner beads, targeted repair often provides satisfactory results with minimal disruption.


However, when dealing with severe damage, like metal corner bead denting or rusting, complete removal is needed, and replacement with vinyl is advised due to its long-term durability benefits. Consider project timelines, budget constraints and quality requirements when making this decision.

Trim-Tex®: The Most Reliable Corner Bead on the Market

Successful corner bead removal depends on proper preparation, technique and patience. Remember that taking time during removal prevents costly repairs and ensures quality results that maintain professional standards.


When replacing corner bead, consider upgrading to vinyl options — like  Trim-Tex’s vinyl corner bead — for improved durability and easier future maintenance.


Tim-Tex’s vinyl corner bead resists impact damage, never rusts and installs faster than traditional metal bead. This dedication to practical innovation has made Trim-Tex the trusted choice for drywall professionals nationwide.


Trim-Tex is committed to developing products that make your work easier, more efficient and more profitable. We've kept this promise for over 50 years and will maintain it for decades to come.


Contact us to learn how our American-made vinyl drywall solutions can elevate your next project.

Frequently Asked Questions

What's the difference between metal corner beads and vinyl corner beads?

Vinyl corner bead is the professional's choice, offering superior impact resistance, rust-free performance and cost-effective repairs. Vinyl eliminates common issues like denting and corrosion while providing long-term durability.


When choosing corner bead material, vinyl's proven track record makes it the clear choice for quality-focused contractors who want reliable performance and easy maintenance.

How do I repair a damaged drywall corner bead without removing it?

For minor damage to a drywall corner bead, start by cleaning the area thoroughly. Then, apply joint compound in thin layers, feathering each coat beyond the damaged section. Let each layer dry completely before applying the next coat. For severe damage, complete removal and replacement deliver better results.

What tools do I need for installing corner beads?

Essential tools include a utility knife, joint compound tools and a corner tool for clean, professional results. For vinyl corner bead installation, use either spray adhesive or vinyl-specific joint compound. Keep tools clean between coats to maintain smooth, consistent application.

Get in Touch with Us

Get in Touch with Us

Questions? Problems? Our award-winning customer service team would love to help.